Short Bytes: Googler allows you to use Google search in the Linux command line. This Linux command line utility can be used as a standalone tool or in combination with a text-based web browser. Developed using Python, Googler can be found on its developer’s GitHub repository.
For Linux users, most of their daily activities revolve around the command line from listing contents of a directory, changing file permissions, installing packages, etc. How about using the internet? Well, there are text-based web browsers for Linux command line in existence. But what’s the first thing we open using these web browsers, it’s Google.
So, what if we could open Google directly without using the command line text-based web browser. Googler can make this happen. we stumbled upon this awesome utility which allows Google Search in the command line.
The Googler command line utility, initially intended for Servers running GUI-less Linux distros, allows you to search Google and open the results using commands. You won’t be able to have rich graphics. That’s something the Linux users can sacrifice with ease.
How to Install Googler to use Google Search from Command Line
Googler is currently not available on repositories of famous Linux distos like Ubuntu. But you can install it from its GitHub repository. You need to execute the commands written below. But before that, you need to update your Python to version 3.3 or higher if you haven’t. To check your Python version:
python3 –version
Install the Git package
When you proceed with the commands below, it may ask you to install Git. Go ahead using the command mentioned:
sudo apt install git
Here are the commands to install Googler
After installing Git, run these commands one by one:
cd /tmp
git clone https://github.com/jarun/googler.git
cd googler
sudo make installcd auto-completion/bash/
cd auto-completion/bash/
sudo cp googler-completion.bash/etc/bash_completion.d/
How to Use Googler For Google Search In Command Line
The Googler command line utility allows you to access Google Search, Google News, and Google Site Search. Here are some examples which would help you get the hang of it:
Open Googler
In the Linux command line and type
googler

Meet the omnipromt
Like the regular prompt in the Linux command line, Googler also has a prompt named omniprompt. You can take the help of the omnipromt keys to easily use Googler and navigate through the search results.

You can execute the queries directly from the command line prompt without opening the utility.
Do the Google Search
googler your_query
googler fossbytes
When you type the number attached to the search result, the link will open in your web browser. You can open the link the command line itself by linking Googler with a text-based web browser. Go to jarun’s github page for the steps.

Search on Google News
googler –news your_query
googler –news fossbytes
googler -N your_query
googler -N Tesla

Search on a specific website
googler -w domain
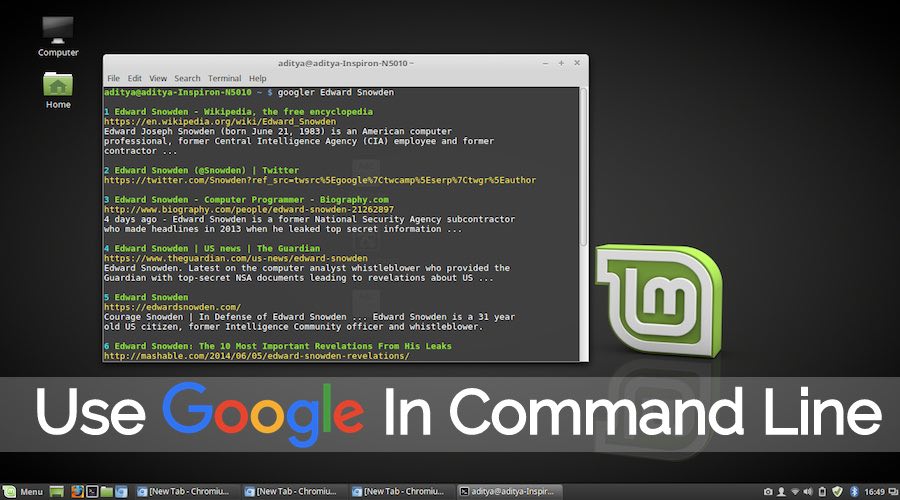
Now type your query (for example, Edward Snowden) in the omnipromt and it will show results from fossBytes.
Alternatively,
googler -w fossbytes.com Edward Snowden

Limit the number of search results
googler –count=N your-query
googler –count=N Snowden

See the Man page
You’ll need some time to know Googler and use it efficiently. Man page will help you with your Google journey in the command line.
man googler

Googler is a feature-packed Linux command line utility. Just like the normal google, you have the advantage of languages, region, time, etc. You can combine various options available on the man page to get most out of the Googler.
“Googler isn’t affiliated to Google in any way,” says Googler’s description.
Note: We tried Googler in Linux Mint 18 Cinnamon and it worked fine. We expect it to work on Ubuntu flavors and its other derivatives.
Googler, released under GPLv3, is developed by jarun. You find the source code on the Googler repository on GitHub. It also contains a demo video for Googler v2.7 and complete installation
Did you use Googler for Google Search in the command line. Tell us about your experience.
Comments
Post a Comment