Today I am going to show you on “How to host your website on Linux VPS (WordPress).”
The reason why we are going to host your website onLinux VPS is because they have more stability and reliability for basic web hosting needs, more control compared to shared hosting, cost effective solutions for small website, assured 99.95% uptime (depends upon your VPS providers) and lot of features.
Buying a VPS from RamNode:
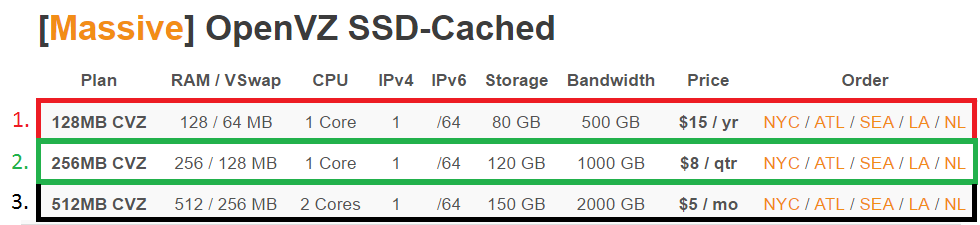
We need to choose a Linux VPS depending upon the traffic your website gonna receive. Here is the link where I brought my VPS from:
Income Traffic 0-750 views/day: Plan 1Income Traffic 750-2k views/day: Plan 2Income Traffic 2k-5k views/day: Plan 3Income Traffic 5k+ views/day: I request you to switch VPS provider since I don’t recommend RamNode VPS for more than 5k views/day, reason is they only provide 1GB connection speed.
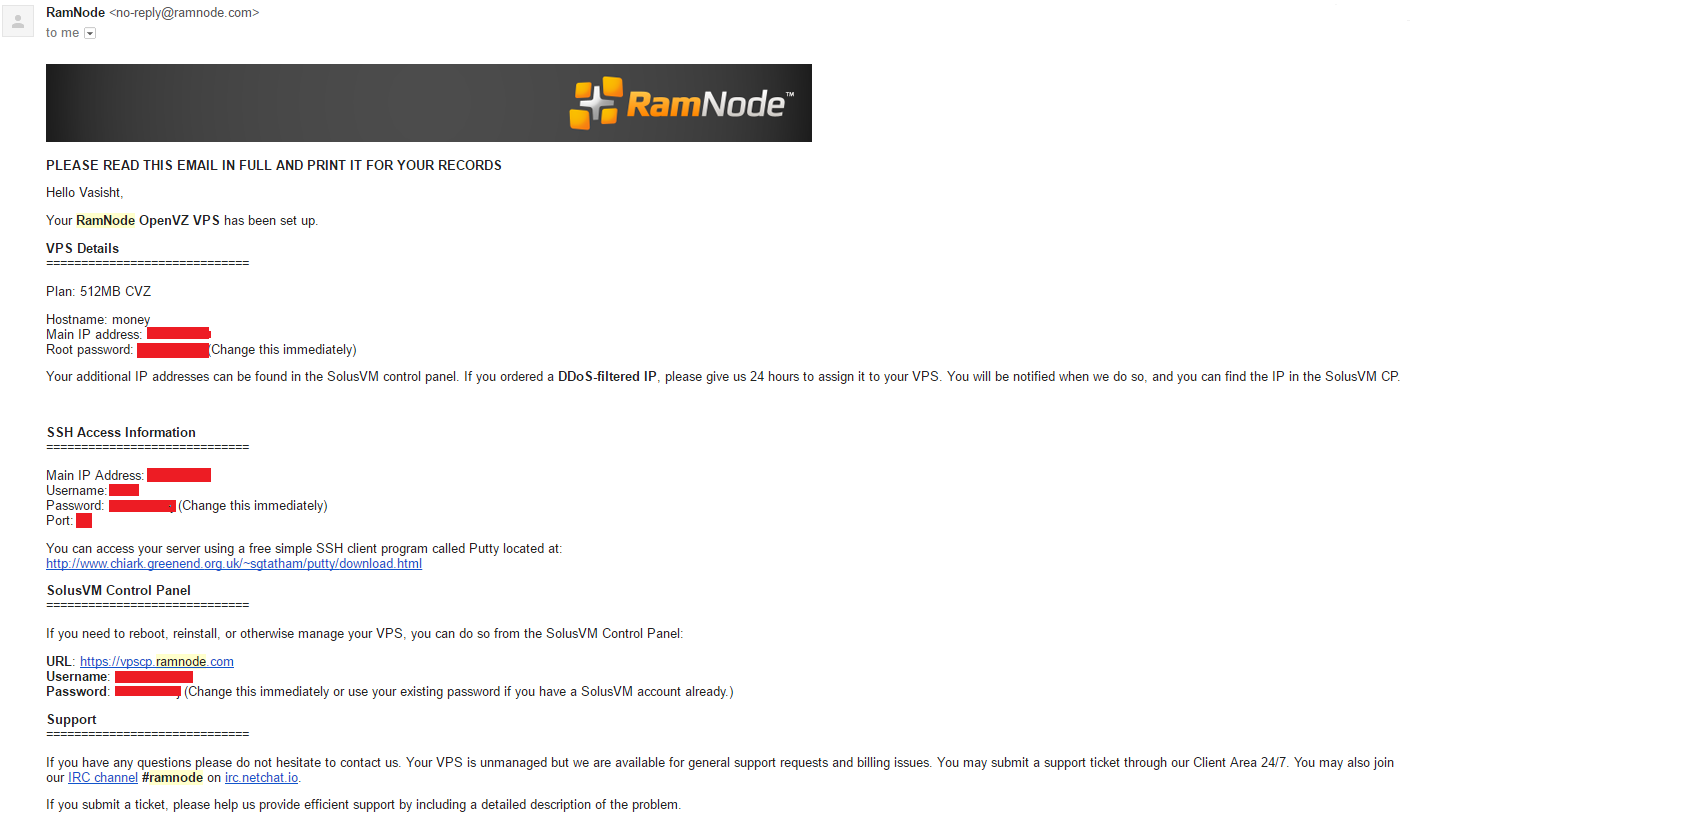
After few minutes you will receive the VPS details.
After buying a VPS continue the steps given below. If you have any doubts do not hesitate to comment below or if you already got a VPS then just follow the steps.WordPress will be my Control Management System to access the website.
Related How to DDos a Website Using VBScript
Buying a domain and configure it:
You can buy a domain from godaddy.com or any place where you like to
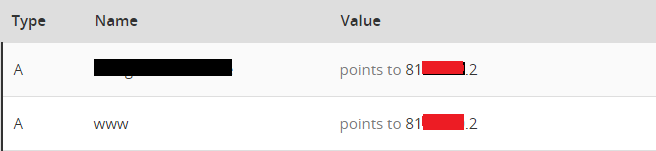
After getting it, in DNS management you have to change type to “A” and enter the domain name and the VPS IP
Example:
By changing DNS settings it will allow your domain to point to your VPS Server.
Setting up VPS:
Goto URL: https://vpscp.ramnode.com and install“Debian 7 32-bit”. It will only take few minutes.
Download Putty and run it. Add your VPS IP and connect to your VPS though Putty. After that enter “username” and “password“.
Enter the following commands in the give order:
1. Update and update debian:
Code:
apt-get update apt-get upgrade
2. Install nginx, php5 and mysql:
Code:
apt-get install nginx php5-fpm mysql-server
3. Download WordPress CMS: (replace example.com with your website name)
Code:
cd /var/www/ mkdir example.com cd example.com wget http://www.wordpress.org/latest.tar.gz tar vxzf latest.tar.gz rm latest.tar.gz
4. Configuring mysql
Code:
mysql -u root -p (press enter and then it will ask you to enter the password for mysql which you used when you install mysql-server)
5. Creating database and granting access to it:
Code:
create database example; (replace example with any name you wish) grant select, delete, create, alter, update, drop, insert, index on example.* to ‘example’@’localhost’ identified by ‘Enteranypasswordwhichyouwanthere’; (Once done press enter and then ctrl + c to exit)
6. Changing WordPress config.php file:
Code:
cd /var/www/example.com/wordpress cp wp-config-smaple.php wp-config.php vim wp-config.php (after opening the file, change your database details and save it)
7. Setting up nginx file:
Code:
cd~ cd /etc/nginx/sites-available/ vi example.com.vhost (rename example.com with your domain name)
Now press “Insert” button and type the following command:
Code:
server { listen 80; root /var/www/example.com/wordpress; index index.php index.html index.htm; server_name example.com www.example.com; location / { try_files $uri $uri/ /index.php?q=$uri&$args; } error_page 404 /404.html; error_page 500 502 503 504 /50x.html; location = /50x.html { root /usr/share/nginx/www; } location ~ \.php$ { try_files $uri =404; fastcgi_pass unix:/var/run/php5-fpm.sock; fastcgi_index index.php; include fastcgi_params; } }
Note: Change server_name with your domain name and root /var/www/example.com/wordpress with your domain name or the folder name that you gonna use.
Once done save the file, press ESC + : + x (to save and exit)
8. Enabling the vhost file:
Code:
cd .. cd sites-enabled/ ln -s /etc/nginx/sites-available/example.com.vhost
Everything is done now. Just type “service nginx restart” and visit your domain now. It should be working fine.
Note: Make sure you change “example.com” to your domain name in each place that I have mentioned “example.com”
If you want to upload any file to your server then use “FileZilla Client” as file manager by connecting to your server using IP , USERNAME, PASSWORD and PORT
Comments
Post a Comment